Employee Actions (Submitter)
As an employee of our Spondoo client looking to be reimbursed for your business expenses, your AutoEntry account will be set up as a Submitter. Your role allows you to upload expenses at any time throughout the month. Your employer should let you know the deadlines for you to submit these receipts for approval – this is typically done monthly.
Your required actions to be reimbursed
To start, you should ensure that you have accepted your activation email to AutoEntry and created your login details. You can then access AutoEntry via your web browser or by downloading the app to your phone.
Once you are set up, follow the steps below to be reimbursed for your out-of-pocket expenses.
Using a web browser to submit a report
Follow the following steps when using a web browser:
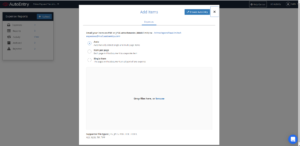
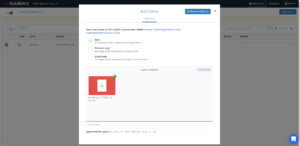
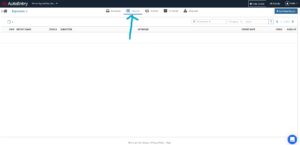
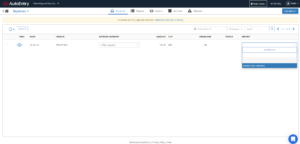
- Upload the receipt or invoice to AutoEntry. To upload a document, click the + Upload button in the expense folder.
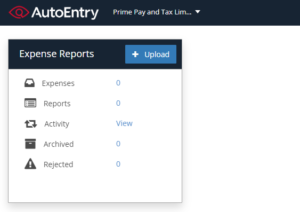
- A new window opens where you can select and upload files directly from your computer (PDF, JPEG, TIFF or XLSX/DOC format) OR drag and drop files straight into the window. You can also e-mail your invoices to your company's dedicated AutoEntry e-mail address.
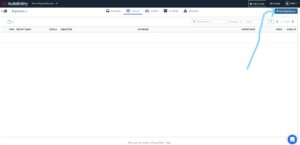
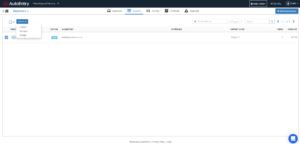
- Next, navigate to the REPORT tab of the expense module to create a report.
- Click on + Add New report
- Name and create the report – It is advisable to use a standardised naming convention.

- After adding a report for an expense period, you can assign all subsequent expenses to it.
- To assign an expense to a particular report, hover back to the Expense tab in the expense module.
- Select all the invoices you wish to assign to a report. Click the drop-down menu next to the Actions tab.
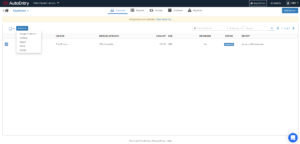
- Then click Assign to a report.
- If you have fewer expenses, you can just assign each expense to a report - by clicking on the drop-down menu in the report column of the expense.
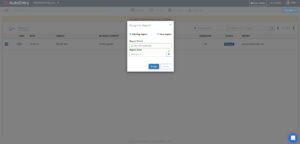
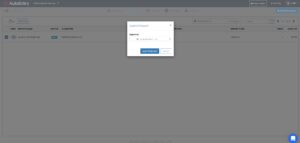
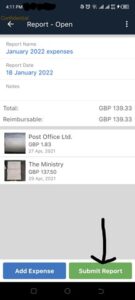
- Once you have assigned your expenses to the correct report, you will need to submit it for approval. To do this, head to the Reports tab and select the project you intend to submit.
- From the actions tab drop-down menu, choose Submit.
- A window will pop up requesting you to choose an approver from the drop-down menu. Select an approver and click Submit Report.
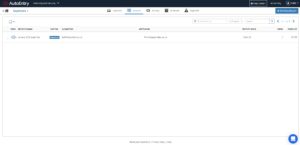
- Once ready, you will see the expense report status as 'submitted'.
Using the AutoEntry app to submit reports
The AutoEntry mobile app allows you to scan and snap your invoices and receipts on the go! You can also create a receipt manually.
To submit a report, follow the following process:
- From the expense tab in the app, Snap or scan your receipt.
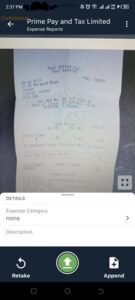
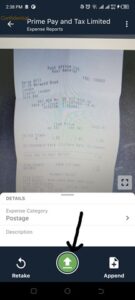
- Assign the uploaded receipt a category – depending on the expense type.
- Press the green upload button (arrow) on the screen - if the receipt has been captured correctly. Once the receipt has been processed, it will appear in the expense tab.
- Navigate to the Reports tab.
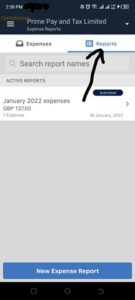
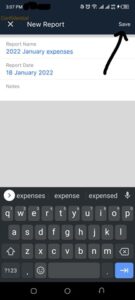
- Select New Expense Report.
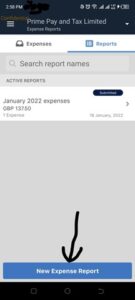
- Give your report a name and Save.
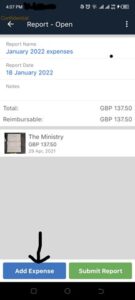
- To assign an expense to a report, open that report and click on Add Expense.
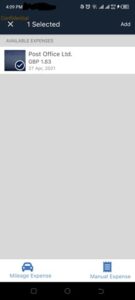
- Select expenses you wish to add to the report from the list of available expenses.
- Once the expenses have been added, click Submit report.
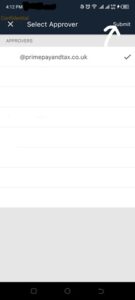
- AutoEntry will give you a list of approvers to choose from.
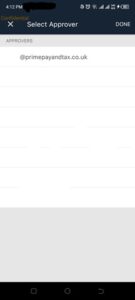
- Choose an approver and click Submit.
Once approved, the report will disappear from the Reports tab and move to the Archived folder.
Are you an approver or bookkeeper? Click here to see what you must do once a report has been submitted.