The Zoho Autoscan feature automatically scans and captures information on receipts and invoices to create expenses. You can upload your documents in any of the following ways:
It is crucial to bear in mind that you can only upload your documents in these file formats: JPEG (JPG), PNG, PDF, DOC (DOCX), TIFF (TIF), XML and XLS (XLSX).
Zoho Autoscan is available on Zoho Books and Zoho Expenses. Our article will focus on the Zoho Books Autoscan.
To enable Zoho Autoscan in Zoho Books, follow the following steps:

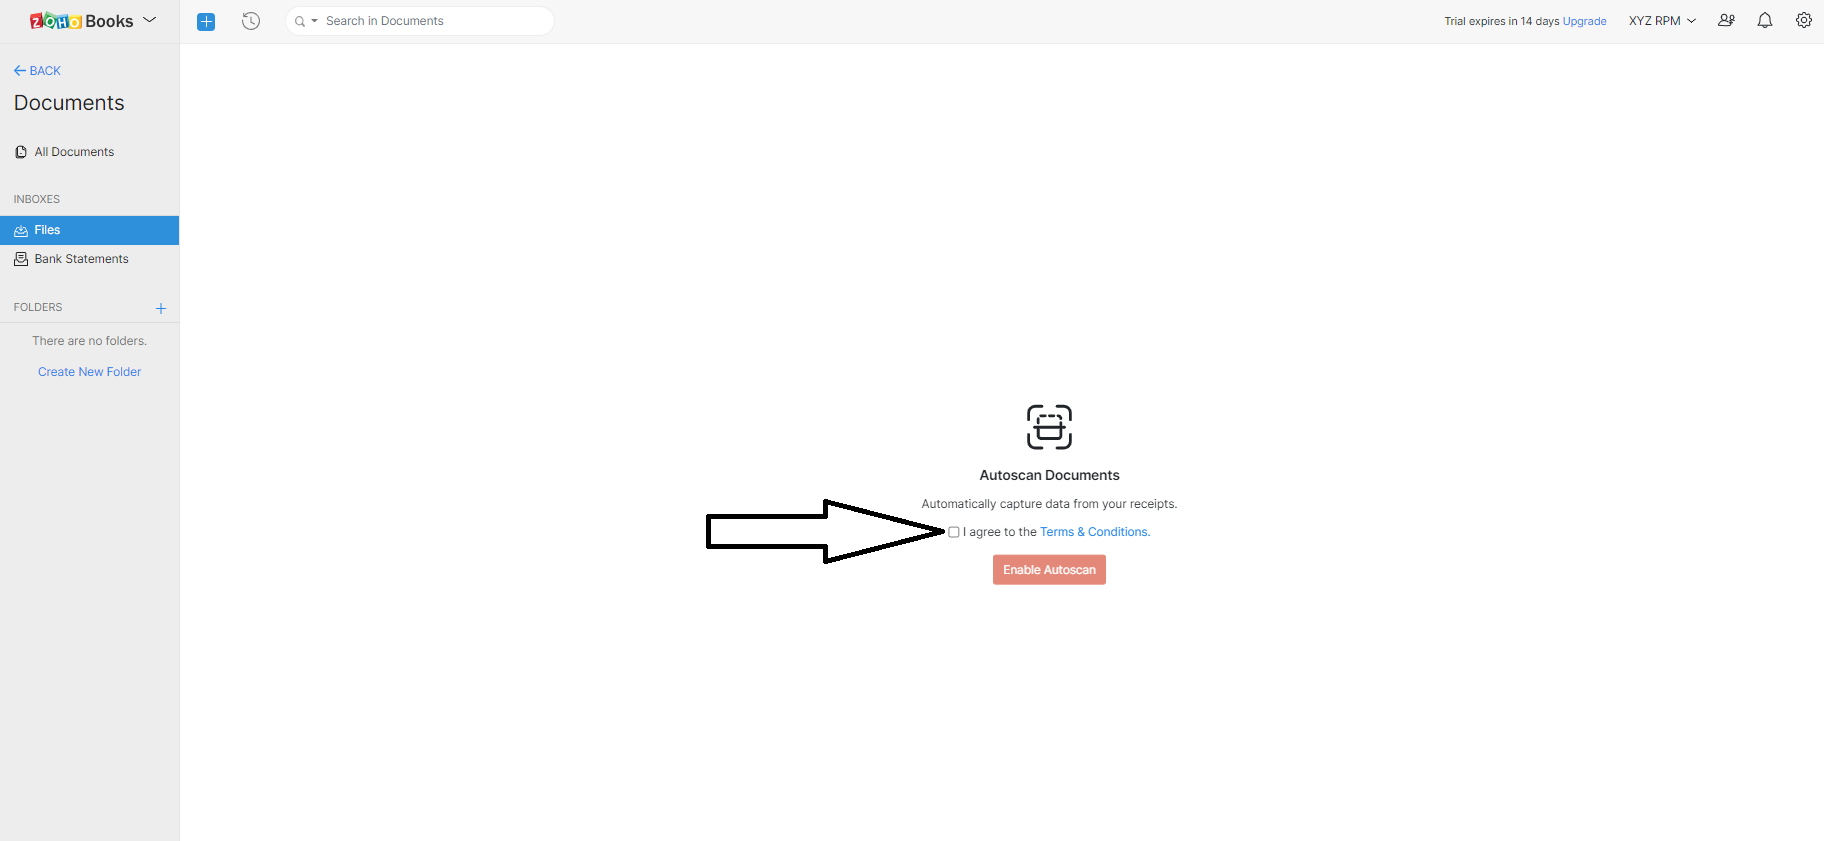
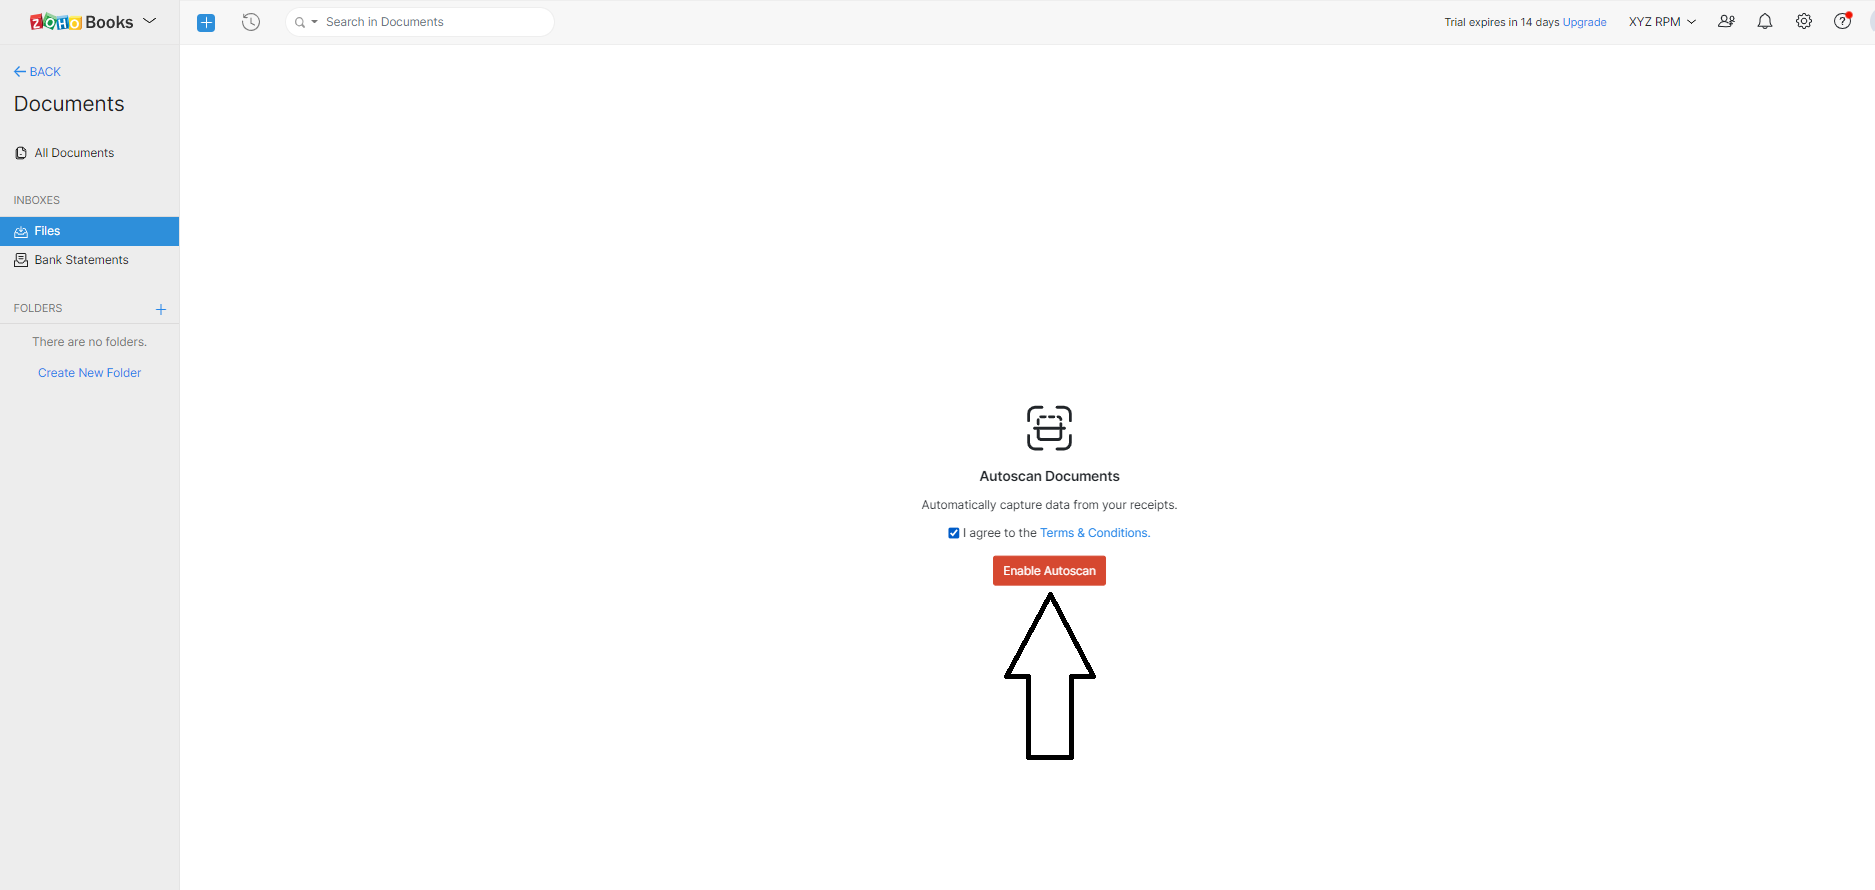
At this stage, your preference will be updated.
To start auto-scanning receipts, follow the following steps:
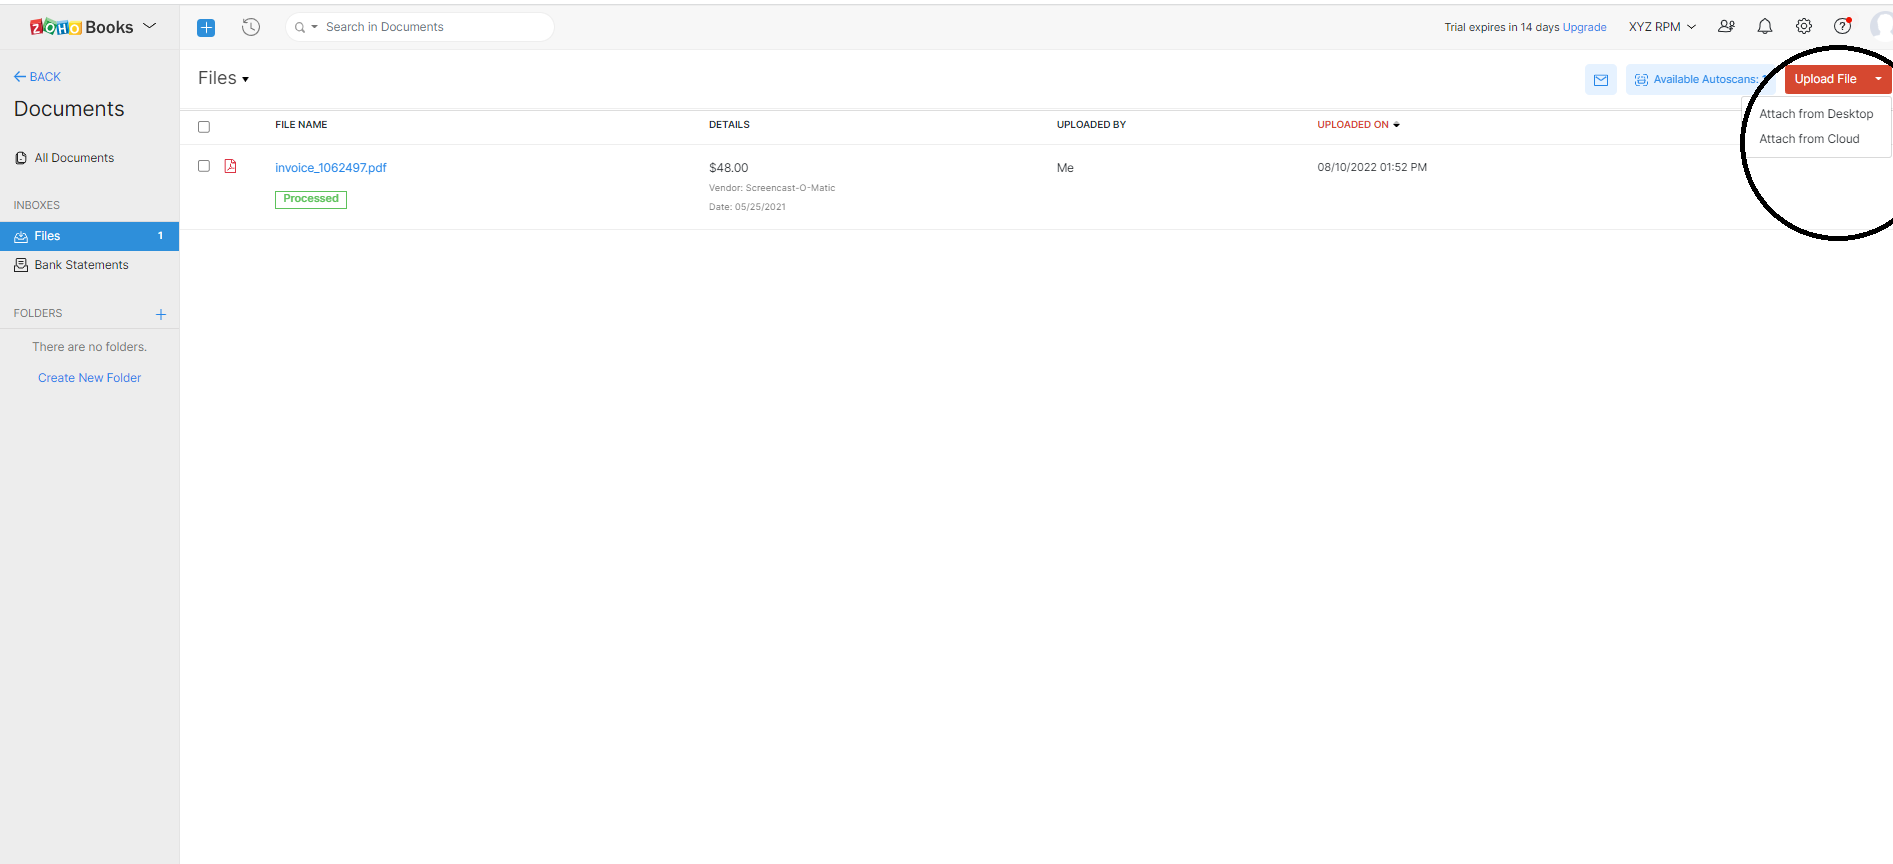
If you have not uploaded any document yet, your screen may look like this.
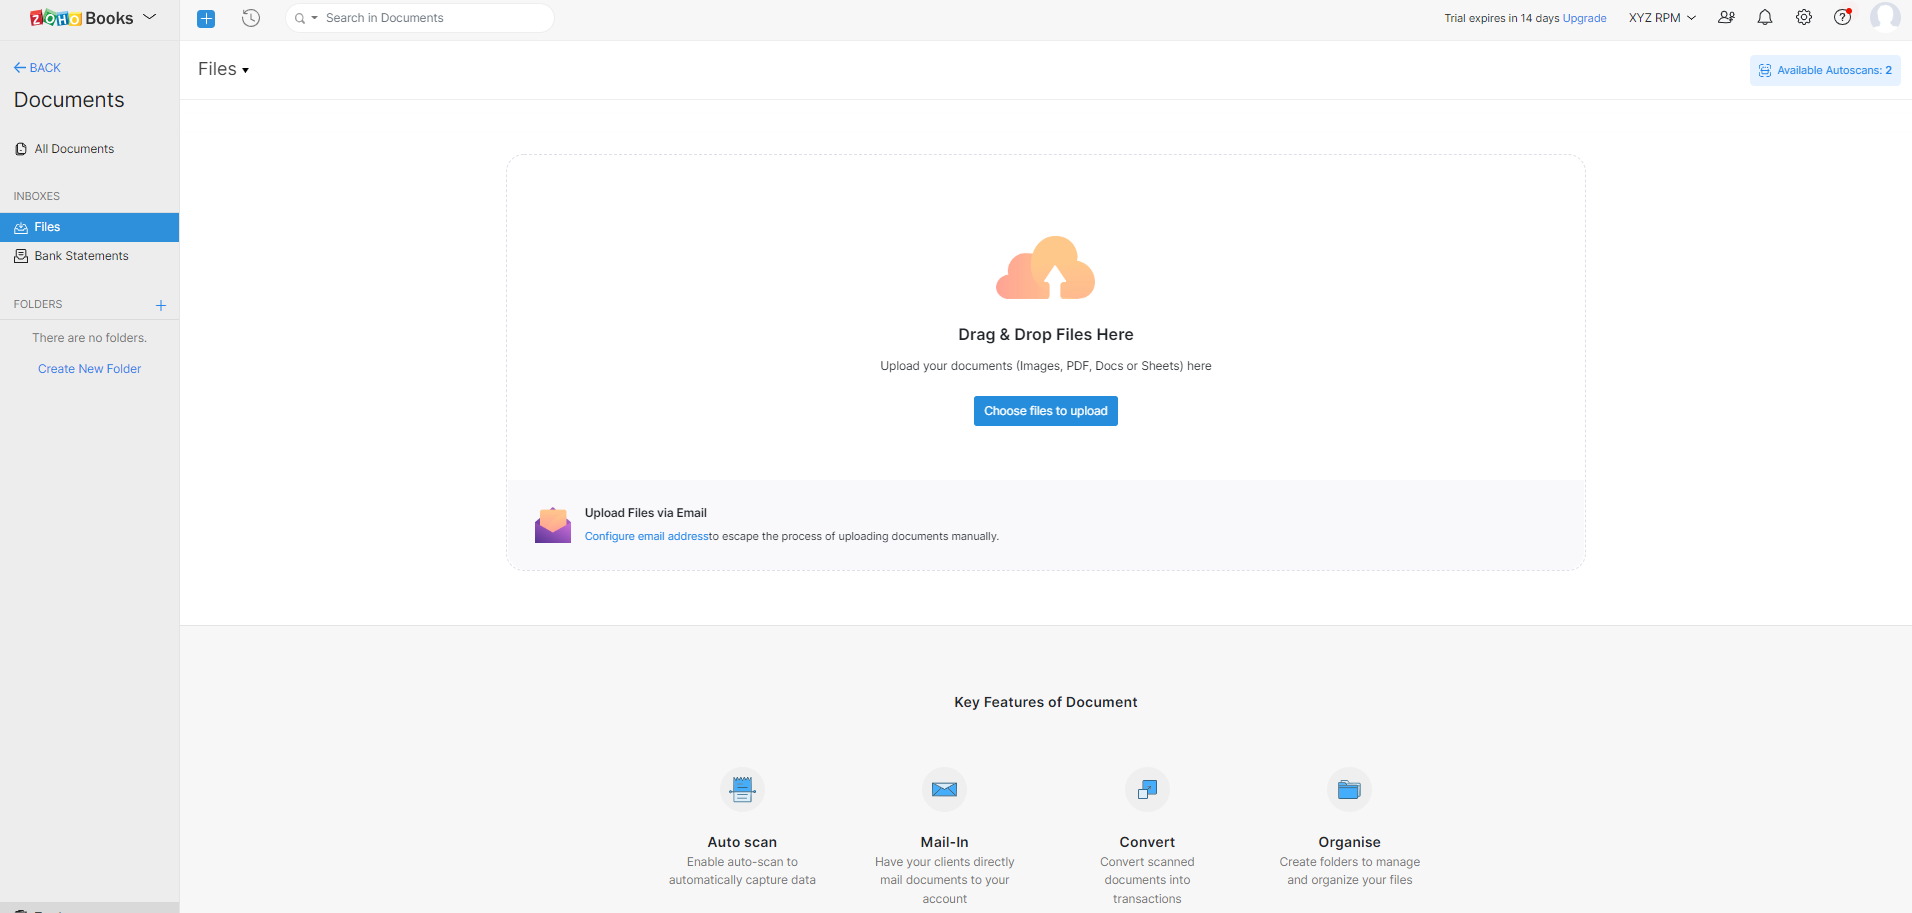
In that case, Click Choose files to upload > Select where you want to get your document from > Upload document. You can also drag and drop your document on this window.
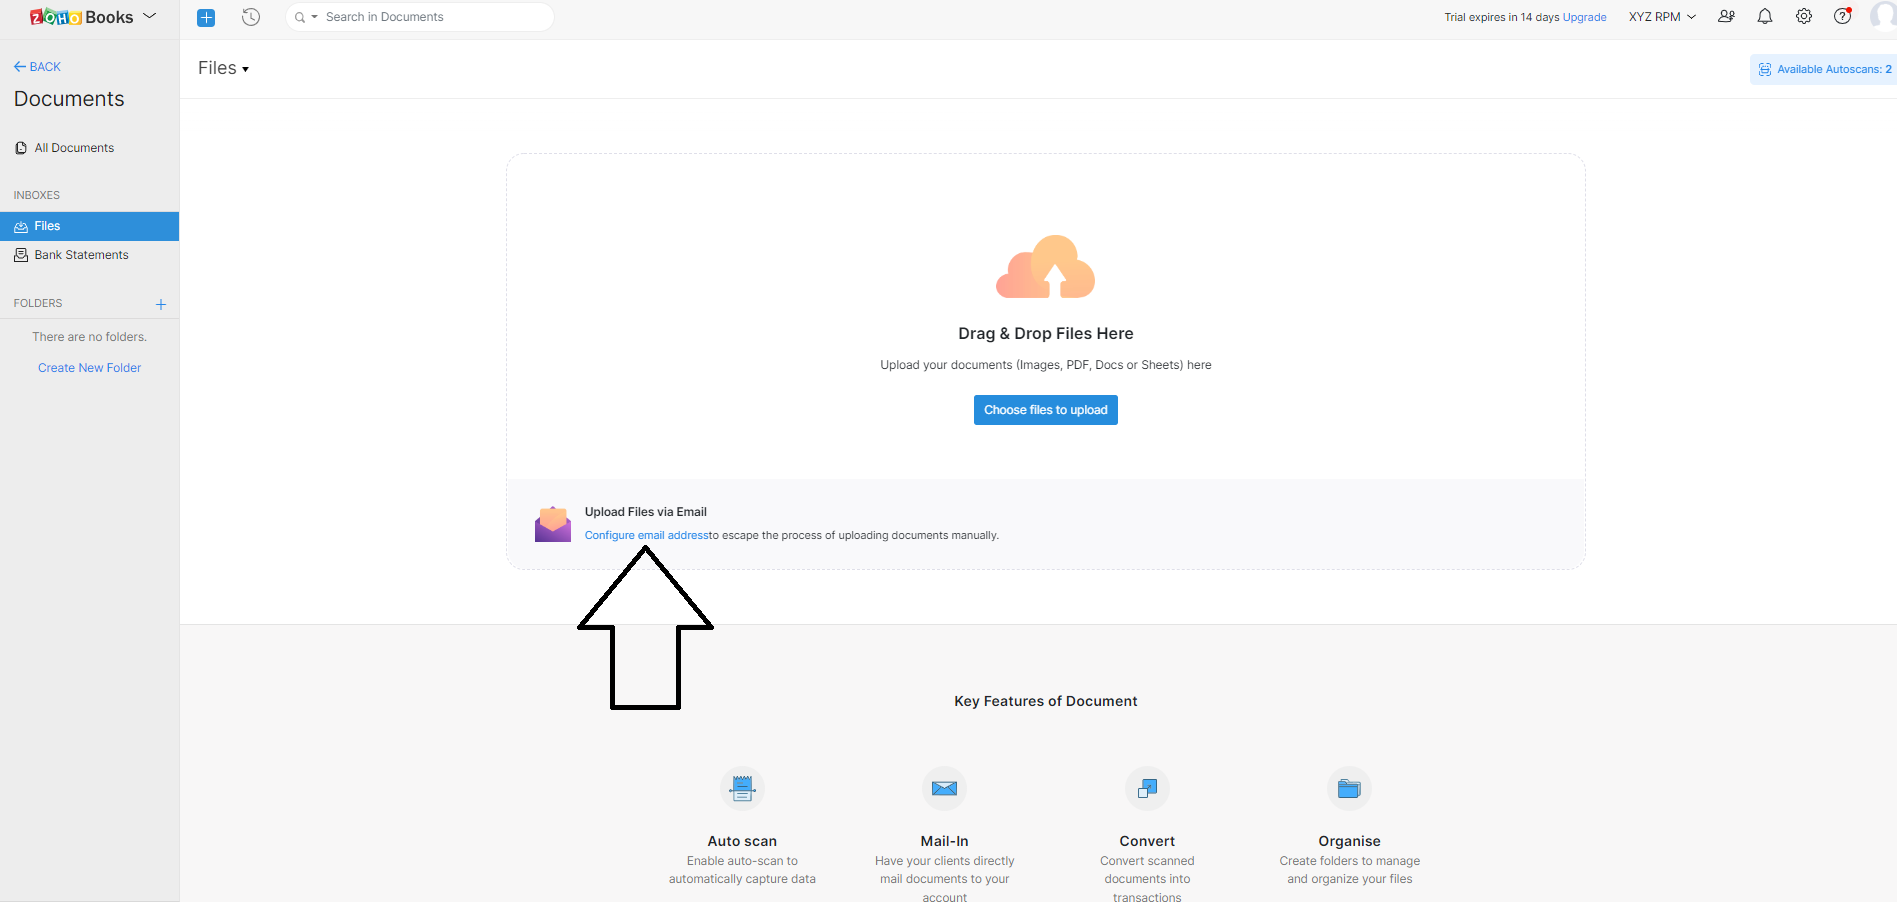
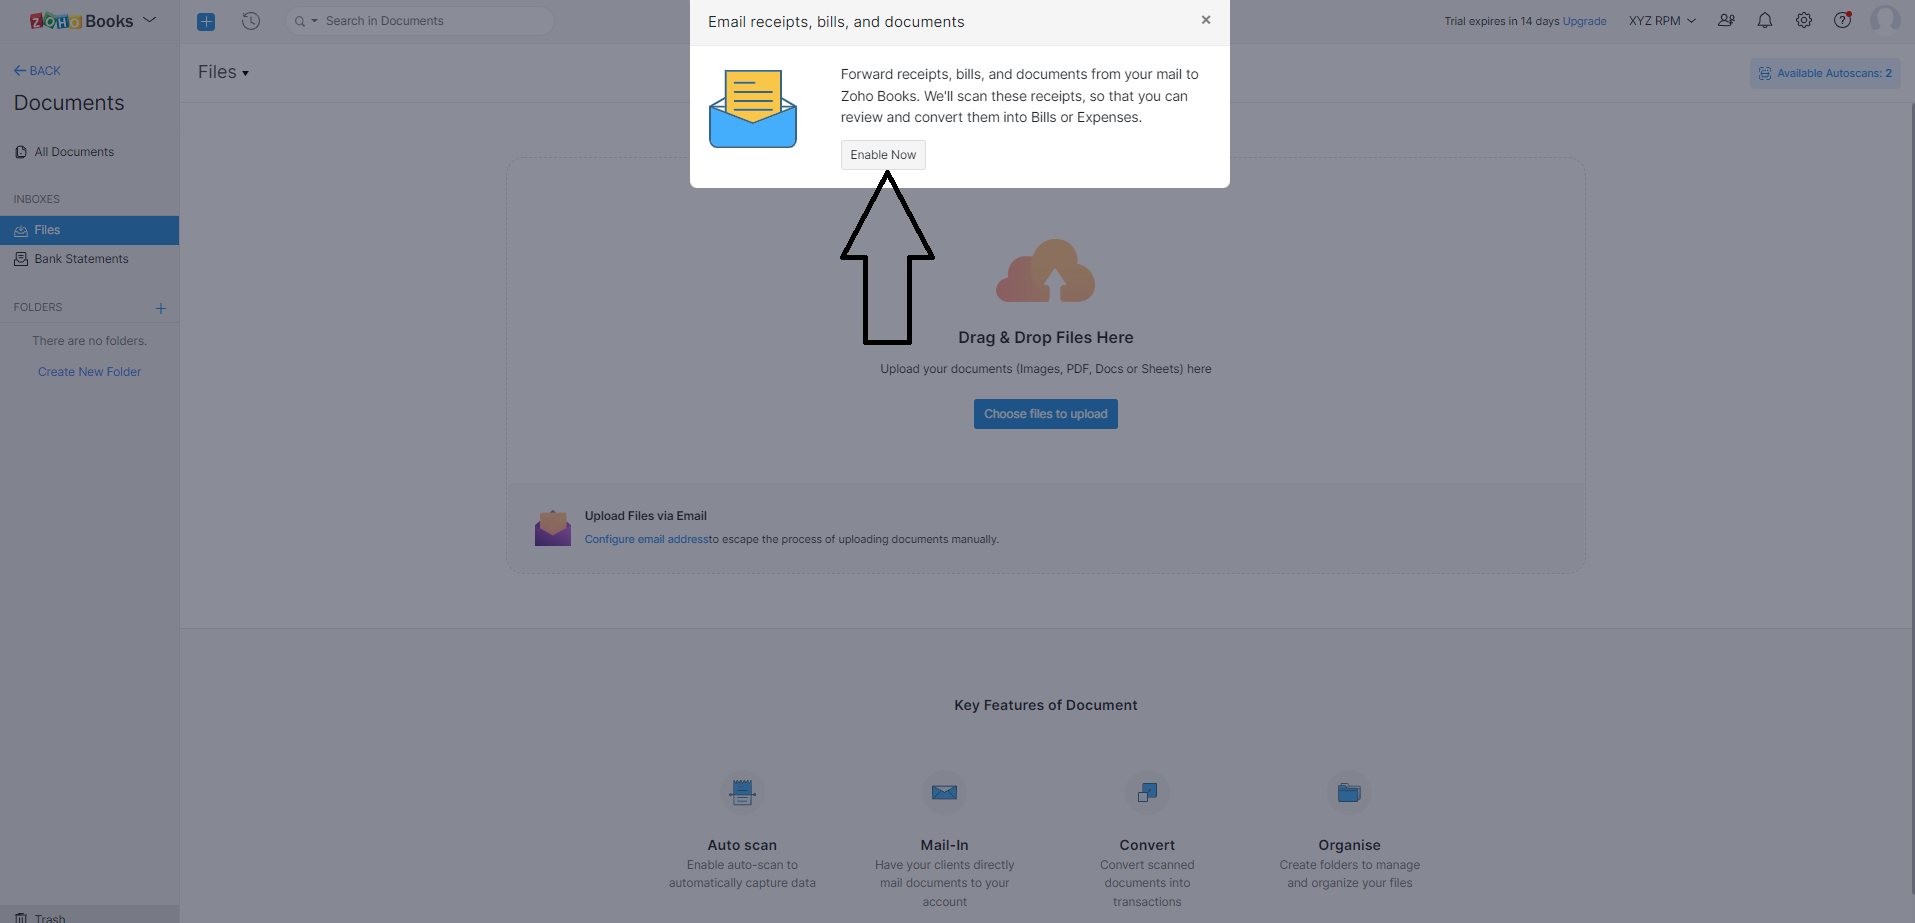
If you want to send your documents via e-mail, follow the following steps to configure the e-mail address:
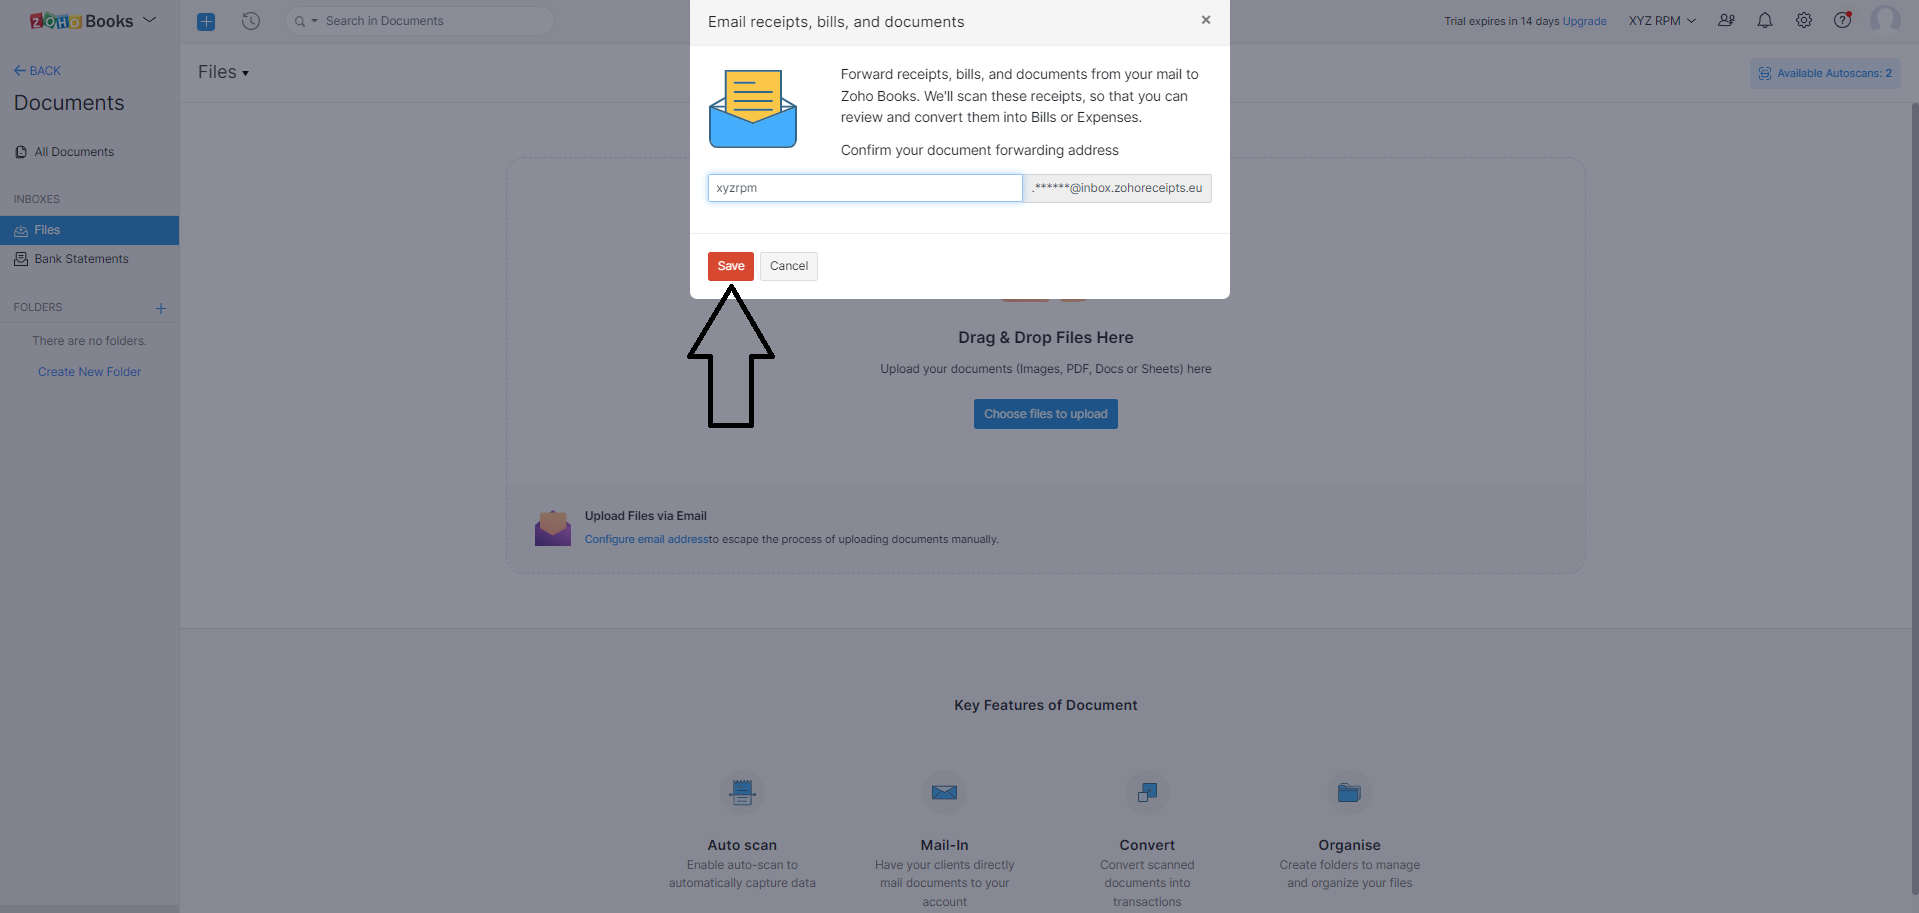
In case you forget your unique e-mail address, you can always find it under documents.
To upload your documents, you send them to the unique e-mail address generated by Zoho. Consequently, they will be uploaded to Zoho Books and scanned automatically.
When using the auto scan feature on the Zoho books mobile app, you scan or take a photo of the document to get it into the application. To do this:
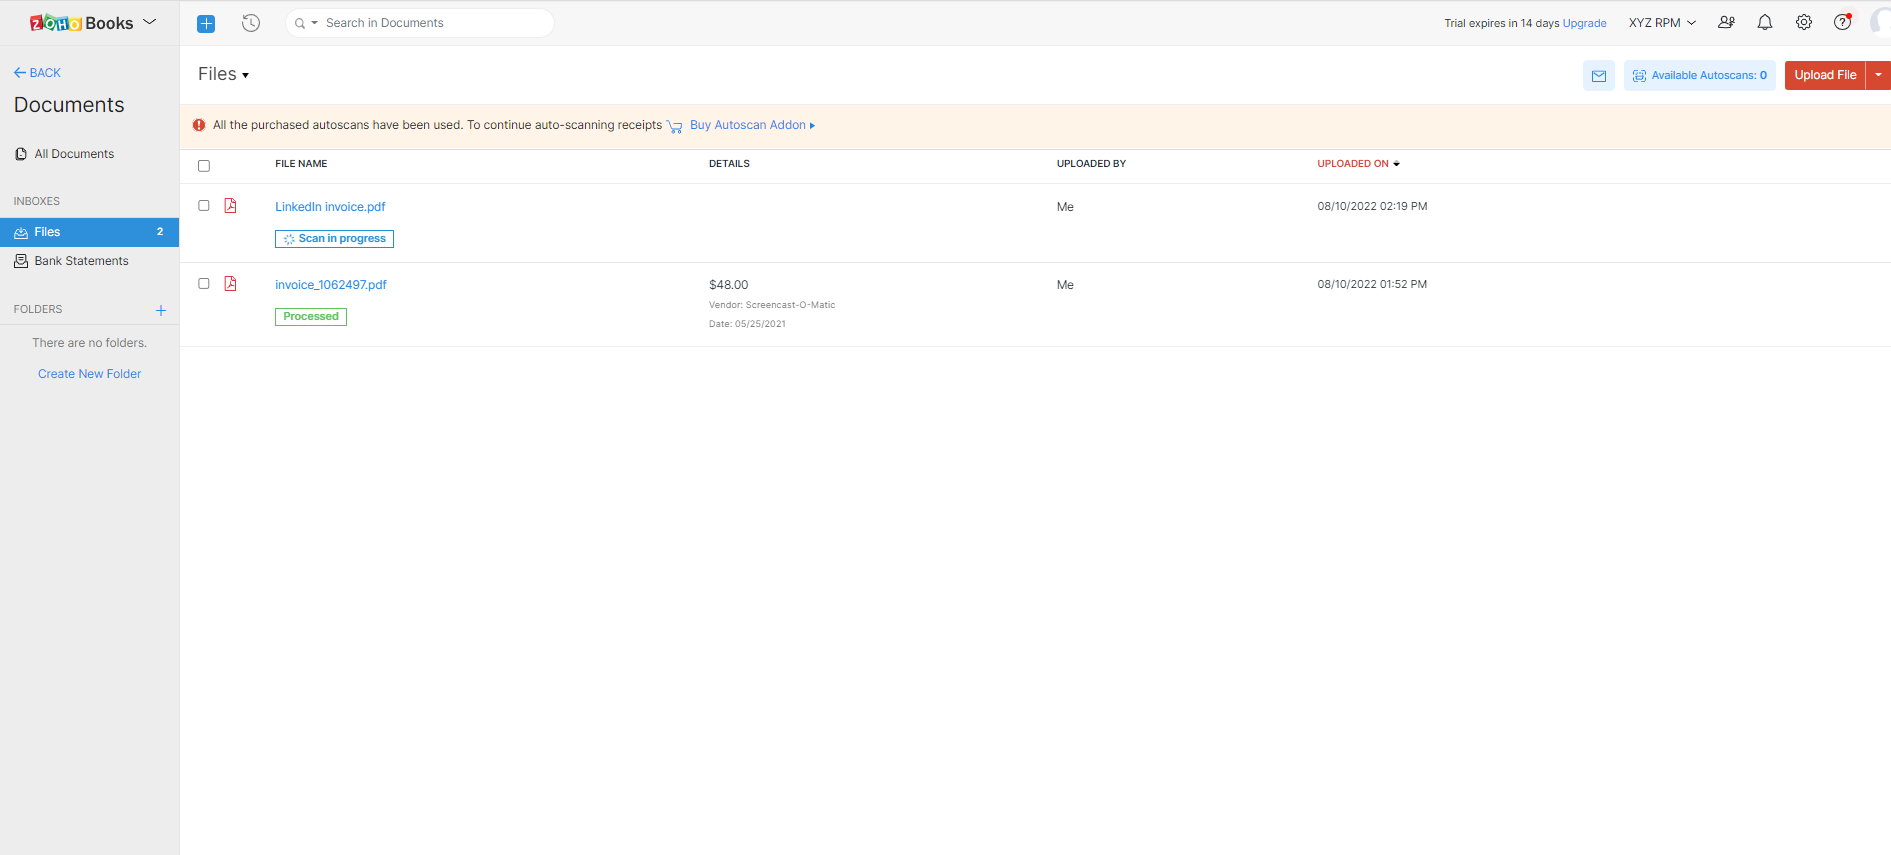
To find out if your document has been uploaded successfully, check in the documents folder under Files.
To convert the receipt to an expense, watch our video on Youtube.